
Integrate Jenkins with GitHub for a simple Java application
Jenkins is a powerful automation tool used for continuous integration and deployment. To set up Jenkins for building a Java project from a GitHub repository, you need to configure JDK, Git, and create a Jenkins job. This guide will walk you through the process step by step.
1. Installing and Configuring JDK and Git in Jenkins
Before running Java-based builds, you need to ensure Jenkins is properly configured with JDK and Git.
Configuring JDK in Jenkins
- Open Jenkins Dashboard and navigate to Manage Jenkins > Tools.
- Under JDK installations, specify the path to your JDK directory.

Configuring Git in Jenkins
- In the same Manage Jenkins > Tools section, locate the Git installations.
- Provide the path to the Git executable installed on your system.
- Click Apply and Save.

2. Creating a Jenkins Job
Creating a New Jenkins Job
- Open Jenkins Dashboard and click New Item.
- Enter a name for your job.
- Select Freestyle project and click OK.

4. You will be redirected to the configuration page where you can add a description for the job.
3. Connecting a GitHub Repository
Adding a Git Repository
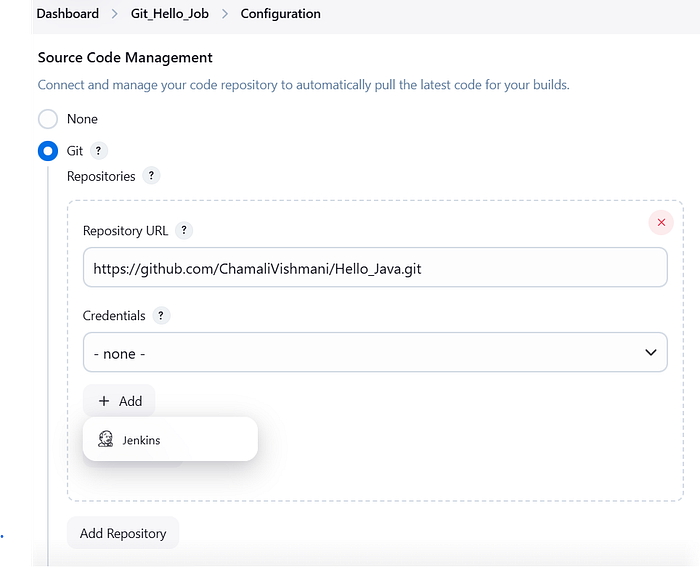
- Scroll down to the Source Code Management section.
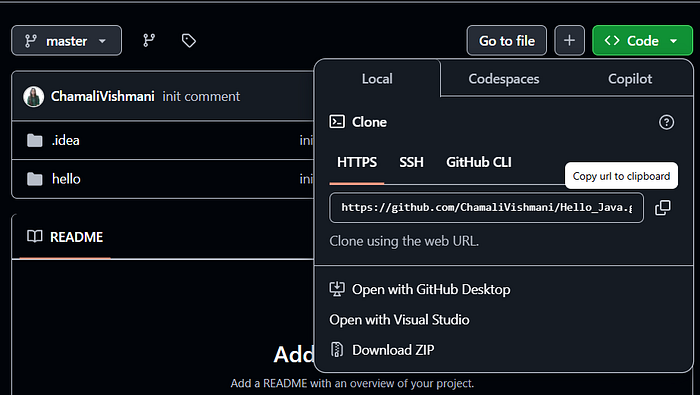
- Select Git and enter the GitHub repository URL.
Setting Up Credentials for GitHub
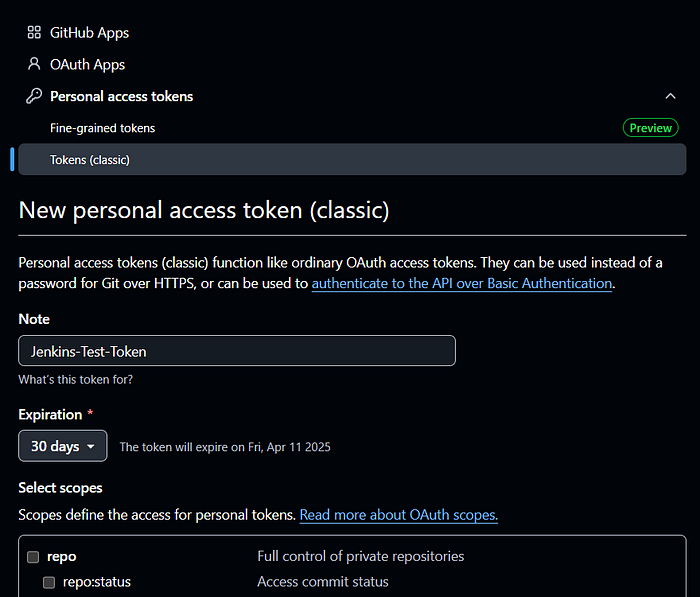
To access private repositories, you need to authenticate using a Personal Access Token:
- Generate a Personal Access Token from GitHub with the necessary scopes.
2. In the section where you add the Git repository URL , click Add under credentials and select Jenkins Credentials Provider. (refer Source code management — Git image)
3. Use your GitHub username and Personal Access Token (as the password).
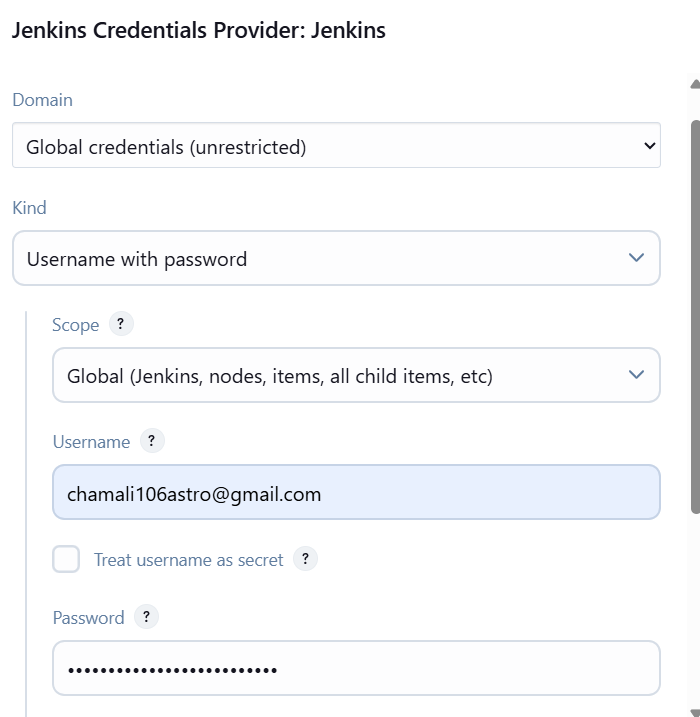
4. Save the credentials and select them in the repository settings.
4. Adding Build Steps
Executing a Java Program
- In the Build section, select Execute Windows batch command.
- Modify the following commands based on your project’s structure to compile and run the Java program:
javac hello\Hello.java
java hello.Hello
3. Click Apply and Save.
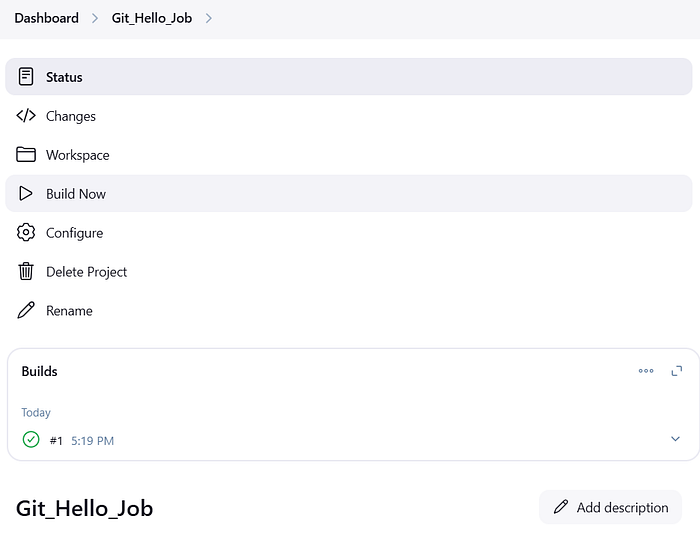
5. Running the Jenkins Job
Building the Project
- Go to your Jenkins job and click Build Now.
- The job will start executing, and Jenkins will:
- Fetch the latest code from the GitHub repository.
- Compile the Java program.
- Run the Java application.
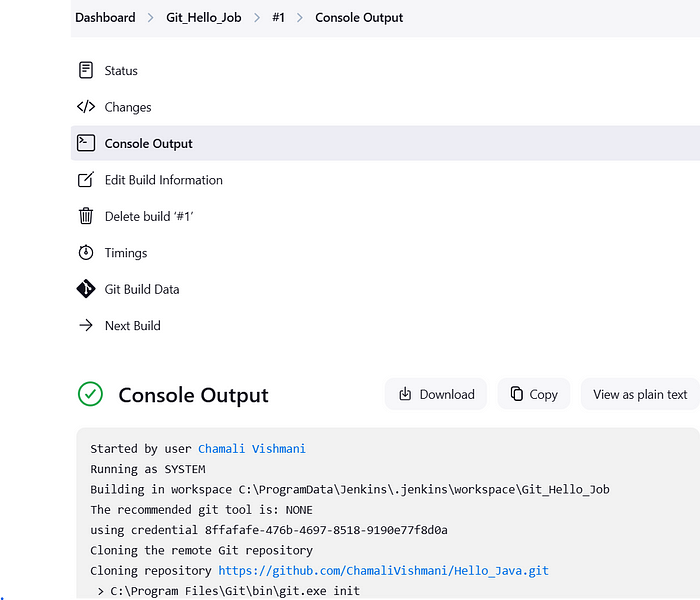
Checking the Console Output
- Click on the Build Number (#1, #2, etc.).
- Select Console Output to see the detailed execution logs.
AND.. you are done.
By integrating your GitHub repository with Jenkins as shown above, you can automate your build and deployment processes, ensuring faster and more reliable delivery of your software.
With continuous integration in place, your development pipeline becomes more efficient, allowing you to focus on writing great code while Jenkins handles the rest.

